
It's always important to understand the intricacies of the materials that you are working with to ensure that your projects go smoothly. Installation can be simplified by going onto a job site armed with the proper information and having done some up front planning. The following is a list of best practices and tips when working with polyaspartics that we hope will serve you well in the field.
- Polyaspartic has an opposite reaction to epoxy coatings with respect to pot life and working time –polyaspartic will take longer to gel in a bucket and a shorter time to set after it has been poured out. During application, pour out only as much product as your crew can cut in and fully apply within a few minute window so you don’t lose the wet edge.
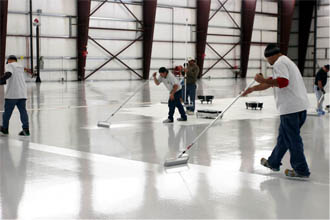
- Do not allow your “cutter” to work too far ahead of the main floor applicators. It is typical practice among epoxy installers to perform the cutting in / edge work well ahead of the guys working the squeegee and finish roll. With the faster set time of the polyaspartic if your cutter gets too far ahead the product along the edges will start to cure before the rest of the crew catches up and you won’t be able to work the rest of the material into the pre-cut edges. This can leave a visible seam or at least a different texture and thickness and difference in appearance between the main floor and the edge.
- Use a smaller squeegee. A 12”- 18” squeegee may take a little longer, but it will leave fewer “bird baths” than a 24” + size. The squeegee person needs to set the application thickness of the polyaspartic and not rely on the roller to redistribute the coating. Relying on the roller to create the finished thickness will lead to over-rolling and an uneven appearance.
- Do not squeegee the ribbon of wet material down to nothing. Doing so will leave a difference in cured sheen. Always keep a small pool of wet material in front of the squeegee. Always start the ribbon pour of the next mix into the wet material that you are currently working.
- Set your work flow up to accommodate for the faster setting material. If you have the opportunity, given the shape of the area you are working in, try to squeegee on the shorter sides of the room and finish roll on the longer sides of the room. This means if you are working in a rectangular room the squeegee should be going back and forth parallel to the shorter edges of the room (making more, but shorter passes) and the roller should be working parallel to the longer sides of the room (making fewer, longer passes with the finish roller). This allows the material to be finished rolled more quickly after it has been placed.
- Do not attempt to install as a 1 man gang! Even on a smaller size job such as a garage the crew should have at least 2 - 3 applicators. More crew members should be added on as the square footage increases or the amount of cutting increases
- Remember that not just warmer weather but also higher humidity will increase the set time of polyaspartic coatings requiring the application process to move more quickly. Installers should own and use a digital psychrometer or hygrometer on every job prior to installation, during application and curing. Understanding that elevated RH acts as a catalyst and will shorten the working time of polyaspartic coatings is very important.
- Select the correct ROCK-TRED polyaspartic formula for the jobsite conditions. Use P-200 when temperatures range from 0° - 40°F, P-100 from 40°-70°F and either P-50 or P-80 from 55°+. If you don’t have the correct version and are forced to install the coating on a job with higher temperature and/or in higher humidity you will want to do the following:
- Reduce the mix size to only as much product as can be applied before it starts to gel.
- Cool the material down prior to installation
- Do not cool it past its reported temperature ranges on the Tech Data Sheets or allow it to freeze.
Share this post:
